Sunday, November 27, 2011

Shopping Bags to Shopping Bags

We do a mostly homemade Christmas here.  We're not big into consumerism, or shopping.  We buy a few things, but we make infinitely more than we buy.

The other night, Zhara and I found a few posts on reusing plastic shopping bags.  We try and use reusable often, but sometimes an occasional plastic bag cannot be avoided, and so, during the year, we save them for various things.  This year we are making reusable shopping bags and purses to give gifts in.

Here is a tutorial :

The first thing you need to do is fuse the bags.  We found this tutorial that was pretty helpful.  My suggestions is to fuse 8 layers of bag at a time.  This means that you should cut off the handles, and then fuse either 4 bags without cutting them open, or 8 bags cut open.  This basically just depends upon the size of bag that you want to finish with, as the cut open sections will create larger fused sheets to work with later.  Try and put the printed sides to the inside to prevent the ink from running.  That can mean turning the bags inside out, or opening them up and putting two printed sides towards each other.

I put a towel on our tile counter top, and placed the bags on that, and covered them in a piece of parchment paper that was slightly larger than the bags to be fused.  Apply an iron that is on the permanent press of cotton setting to the parchment paper.  You will be able to lift up the paper and see the plastic fusing.  Make sure to get the edges.  Turn over and do the other side.  When it is completely fused, you can decorate.

Zhara wanted to make them especially awesome by cutting out sayings or pictures or letters to create new words, sayings, or pictures on the finished bags.  My suggestion is to apply these at the very end, lest you melt the lettering.  Place them on the bag, cover with the parchment paper, and fuse those briefly until they are completely adhered.  Let your sheets cool.

I went ahead and did like 20 sheets of bags with all of our old bags, then took them to my sewing room when cooled, and used them like fabric to make multiple bags.

I did several versions of bags, but since most of them would be going to women or couples, I tried to make them usable either as small shopping bags or purses.  I gave them reinforced fabric handles (or you could purchase handles at the fabric store), and a small pocket inside.  I also gave them a velcro closure (though you could use any type of closure) so that they could be more secure if used as a purse.  I made the smaller version to the left by cutting two identical sizes of fused bags and sewing around three sides with the right sides together.  I sewed perpendicular across the bottom seam and trimmed the excess to make a stand up bag. Turn it inside out.  Then I decided to reinforce it some more.


I sewed around the bottom to make it sit easier. I also zig-zagged around the top seam to make it more durable.

I think this size would be great as a small produce bag, for light shopping, like the pharmacy, or as an everyday purse. I plan on giving this one with a bottle of my husband's homemade wine and some homemade chocolates, or a pair of homemade flannel pj pants for a lovely holiday gift.

The other size I've made so far is larger.  It has two wide identical rectangles for the front and back, and two narrow identical rectangles for the sides, and another rectangle for the bottom.  My tip is to sew the four sides, inside out first. Then size the final rectangle after those are sewn.  Pin it to the bottom, and sew all the way around.  Turn it right side out, reinforce where you'd like, I sewed about three inches down the top of each side to make it naturally turn in instead of out.  I also zig-zagged the top, added fabric handles, an inside pocket, and a velcro closure.  

I think this one would be a great size for a regular shopping bag, a larger purse, or a diaper bag. You could fit most gifts in this bag.

The smaller bag contains about 8 former plastic bags.  The larger one around 16-20.  You can make them as large or small as you'd like.  My daughter has already requested small purse sizes for her friends for Xmas.  

Make something from the heart, reuse an item that has major ecological implications for our planet, and perhaps pass along a love for the planet and taking care of it, to someone who might not otherwise use something recycled.  Perfect!

Monday, October 10, 2011

Magnetism


A couple of weeks ago, we discovered that Lowe's has these awesome horseshoe magnets for $1.70 a piece.  Today we bought three more of them (one for each kid, because I was attempting to minimize fights).  We decided to learn some things about magnetism.  So I pulled out one of our science experiment books, and a piece of poster board, and we got to it.  We decided to record our findings on the poster, then as we learn more, we can add on.

First, we told each other what we already knew about magnets, and I wrote that down.  Then I sent the kids on a scavenger hunt to find household items, and we tested them with our magnets, which taught us even more about magnetism and what magnets do and do not attract.


 Then we did an experiment with a glass jar, and some paper clips to see if we could move them through the jar with the magnet.  We could, even when they were attached to something heavy like a clay snake.  We tried several other mediums to try and pull things through.  The table was too thick.  A lego board worked. As did a plastic cup.

We learned about polarity, and the north-south pull of magnets, and did an experiment by putting the horseshoe magnet on a stick and watching it "magically" rotate so that it was always pointing north/south.

Overall, a very fun way to spend an afternoon.

The Corn Maze and Pumpkin Patch

Eli and Wednesday as Frankenstein and his bride
 This story could start with, it was a cold and wet afternoon, when the Dayhoffs and McKinneys trudged through the corn maze.  Wow, was it ever!  Despite much of the country, our late summer/early fall has been very warm, so we were rather taken aback when we arrived at the pumpkin patch on Saturday and it was around 50 degrees and raining.  But we trudged on, as we were there, with our friends, and we were going to do this thing.


 There was a great deal of discussion about which way to go to get through the very long, very windy corn maze.  Sometimes they took votes, sometimes they asked dad.  Wednesday just ran.  The whole time.  Very loudly.  Everyone has their own method.

 We knew it had rained, but we had no idea the extent of the mud.


Did I mention it was muddy?  Very muddy?  Like the end times muddy?  Yay, it was.


 A rare moment of Wednesday neither screaming nor running in the corn maze.  She's waiting to have her list punched so she could get a piece of candy at the end for completing the whole maze.


 After we made our way out of the mud, er, I mean corn maze, we headed over to the pumpkin patch.  The pumpkins were huge this year, and the pumpkins are all the same price, regardless of size, so the kids bought some big ones.  Thankfully, we brought the wagon for just such an occasion.


 The big kids took off for the back of the field with dad to see if there were even larger pumpkins there.  Wednesday followed them for a bit, but then she got worn out. I don't know about pumpkins, but there was no shortage of mud.

Wednesday does a little heavy lifting of our pumpkin haul!

Maritime Studies, or Learning about Flotation


 Awhile ago, I told you about the science experiment kits that I ordered from Kids Woot this summer.  They are wonderful for days when I'm not sure any of us are going to make it until dad gets home.  Last week we had just such a day, so I whipped out the kit about boats and flotation.  It has ten pre-prepared science projects.

I let the kids each pick one and it made things better, at least for awhile.  This is your dose of homeschool reality -- it's good, but it ain't always roses I'm just saying.  :)

Wednesday picked the experiment to determine what objects float.  So the kids ran around the house collecting things to try out, and Zhara recorded what floated and what didn't in the science booklet that came with the kit.

It also suggested, in the same experiment, trying the floating egg trick.  So we learned that an egg will sink in regular water, as the egg is heavier than the water.  However, when you add a considerable amount of salt to the water, the egg floats, because the water is denser due to the dissolved salt.  We were already familiar with the concept -- heck, we live 45 minutes from the Great Salt Lake -- but it was still nice to see it demonstrated
Our floating egg

 Then we did Angus's chosen experiment, which was to use the enclosed clay (I told you these kits were awesome), and to divide it into two equal parts.  With one we molded it into the shape of a boat, with the other we made it into three different shapes -- a ball, a ring, and a disc.  Despite the sameness of size, the boat-shaped clay floated, while the other three did not, because the boat was made into a shape that displaced the water evenly, allowing it to float, while the others did not.

 Finally, with Zhara's experiment we made a rubber band propeller boat out of the enclosed pieces, and drove it in the hot tub, learning about potential stored energy and how it is released.  Wednesday got in for full effect.


Angus then made a boat out of Legos to see if he could get it to float in the same manner as the clay boat, which it did.  Hooray for our own experiments!


Monday, October 3, 2011

Halloween is Coming


 We are fans of Halloween.  Really, we are.  So last year when our friends, the McKinneys, made these delightful Halloween votives out of old glass jars, I was in.  We were going to make them with the McKinneys when they came over to play the other day, but then we got busy making other Halloween crafts, and playing, and that didn't happen.  So today, having saved many a spaghetti sauce, jelly, and iced coffee bottle, we made some of our own, using a bit of paint. 


 Wednesday worked on a jack-o-lantern, and Angus made a Frankenstein and a ghost.

Zhara made candy corn, a Frankenstein, and a Bride of Frankenstein.  And I contributed several of my own, because I'm just a big kid when it comes to Halloween, too.


We plan on adding tea light candles to them, and placing them outside on our front steps.  I think they'll be especially spooky for Zhara's Zombie Prom in a couple of weeks. 


Wednesday, September 28, 2011

Zombie Prom In Progress

Each year Zhara hosts a Zombie Prom for her friends. This year she's going to have an Adopt-a-Monster basket for her friends to each take a monster home. I had a lot of fun making these felt monsters, which is probably why they're already done!

Monday, September 26, 2011

Making Silly Putty, or Why I Love Science Experiments with Unschoolers


I must admit it, I have become slightly obsessed with pinterest. If you haven't checked it out, yet, you should!  Craft ideas, homeschooling stuff, recipes, just so much fun.  Anyway, last week, I found this great recipe on there for making your own homemade silly putty.  Perfect, I thought -- we're super keen on anything that's part toy and part science experiment.  We purchased the required ingredients.  It wasn't tough.  It took a trip to Wal-Mart, and we got Elmer's Glue-All (not school glue), which was conveniently still on sale for back-to-school, and a $3 giant bottle of Sta-Flo liquid starch.  Oh, and food coloring if you want to color it, but we already had that. 


First, we poured glue into the bottom of a bowl (one for each kiddo), then we added the food coloring until it was their desired color -- red for Angus, pink for Wednesday, yellow for Zhara.  We stirred and stirred until the color was completely integrated.
Then we added the liquid starch, and stirred.  It immediately starts to goo up, as it soaks into the glue. 
It takes about 5 minutes to completely soak in.


There was lots of stirring.


 And some poking.

 
And, of course, plenty of squishing and dripping.  
It is science, afterall, we need to fully understand our results.

 After it's mixed for about 5 minutes, then the real fun begins.  You take it out, dry it on a paper towel a bit, and knead it until it turns into Silly Putty.


Look, we made Silly Putty!


After that, all bets were off, and we experimented wildly.  This is why I love unschooling.  One "experiment" always turns into about 40, as they ask more and more questions.  In fact, as I type this, they are still at it.


What would happen if we ran it through the pasta maker that grandma got us for Play Doh?

Answer: It thins out and then immediately rebounds into shape, unless you put it on the very thin setting, which shreds it into bits.


How does it feel on your feet?  Cold and squishy.


 Can you build things with it?  Answer: Yes, here Angus demonstrates making Patrick Star out of Silly Putty


 Will it really pick up news print? Answer: Why, yes, quite well.


What happens if we make white Silly Putty?  Will it pick up the news print even better?  
Answer: Why, yes, yes it does

 And the most popular and long lasting one thus far. How far will it stretch? 
Answer: a really really long way.

They are still experimenting... I'll let you know when they're done.  It may be awhile. :)

Building a Firetruck

We do a lot of things.  We go a lot of places.  Sadly, though, because Adam has to work, we don't often get to include dad.  This makes dad sad, and it makes the kids sad, because they absolutely adore him.  That said, when you live in Utah, home of families with 10 and 12 kids each, doing things on the weekend can turn into a crazy explosion of people that none of us like.

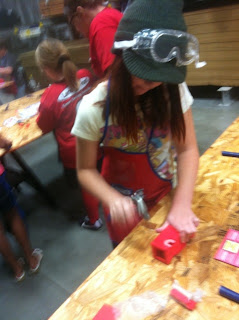
So the last time we were in Lowe's, we decided maybe trying to do their Build and Grow building projects every two weeks on Saturday morning might be good, as it's early (at 10 am), free, and something we could do independently.  Plus, dad loves to build.  We've done them in the past, but it's been awhile.  Plus, you don't have to sign up ahead of time, so if we decide to skip a week, we can!

So Saturday, we went and each of the kids got to build a firetruck.  It was fun, Wednesday and Angus needed more help, whereas Zhara did it almost all herself.  Each of the kids really did a great job, though, following the directions and building their toy.


 We got to hammer.. and there were stickers!


Happy builders with their new fire trucks, with real working sirens!